Thursday, 10 January 2013

My favourite eyeshadow palettes - EVER!! Urban Decay, Naked 1 & 2Palettes.

Good Day/Evening lovely people,

So I'm going to keep this quite simple as everyone has heard about these before and everyone loves them but I couldn't not write about them.

I bought one in the U.S while I was over there and the other, I bought off EBay as it is extremely hard to get Urban Decay here in Australia.

So of course, I'm talking about the Urban Decay, Naked and Naked 2 Palettes. Everyone has heard about these things if you watch YouTube or read Beauty Blogs but I am so in love with these things I had to write about them.

So for the people who don't know about them, they're a palette that has 12 Eyeshadow Colours in them. Mostly all Neutral colours they are beautiful and creamy and some are shimmery and some are Matte. If you're not a huge Makeup Junkie like me and just want something that you can do your Makeup every day with but then have some colours to sexy it up at Night, these palette's is AMAZING for you guys. If you're going away for a weekend or holiday you could literally pack one of these babies and you'd be set.

So the original Naked Palette is my favourite one, personally it just suits me better, it has beautiful highlight colours and lighter lid colours but then has the browns and gold and a bit of a sparkly black that I LOVE! I could literally go on holiday with this one and I'd be one happy camper - and that's saying a lot because usually I'm packing everything "just in case".
 The colours Naked Palette has is -
     -Virgin - Pale shimmery cream colour
     - Sin - Pale shimmery Pink Colour
     - Naked - Light Mauve colour
     - Sidecar - Champagne gold colour
     - Buck - Matte Brown Colour
     - Half Baked - Shimmery Gold Colour
     - Smog - Shimmery Deep Brown Colour
     - Darkhorse - Shimmery Dark Brown Colour
     - Toasted - Browny Gold Shimmery Colour
     - Hustle - Mid Brown/Burgandy Shimmery Colour
     - Creep - Shimmery Black Colour
     - Gunmetal - Dark Grey Shimmery Colour


I use this palette pretty much every day and it hasn't even been dinted the colours. A little goes a long way and I love it. This also came with a Urban Decay Brush and also with Urban Decay Primer Potion - which is also amazing.

Naked 2 Palette, is very similar but still very different. I absolutely love this one too, I just personally prefer the Naked Palette for my personal use. This also came with an Urban Decay Brush which I love - it's a dual sided brush with a normal eyeshadow brush on one side and fluffy blending brush on the other side, which I use all of the time!. The colours that are in this palette are -
    - Foxy - Cream Colour
    - Half Baked - Shimmery Gold Colour
    - Bootycall - Shimmery Cream/Pink tinge Colour
    - Chopper - Light Brown Shimmery Colour
    - Tease - Very pale brown colour
    - Snakebite - Dark Brown shimmery colour
    - Suspect - Light Gold shimmery Colour
    - Pistol - Shimmery Grey Colour
    - Verve - Shimmery Champagne Colour
    - YDK - Shimmery Medium Brown Colour
    - Busted - Deep Purple Shimmery Colour
    - Blackout - Black Colour

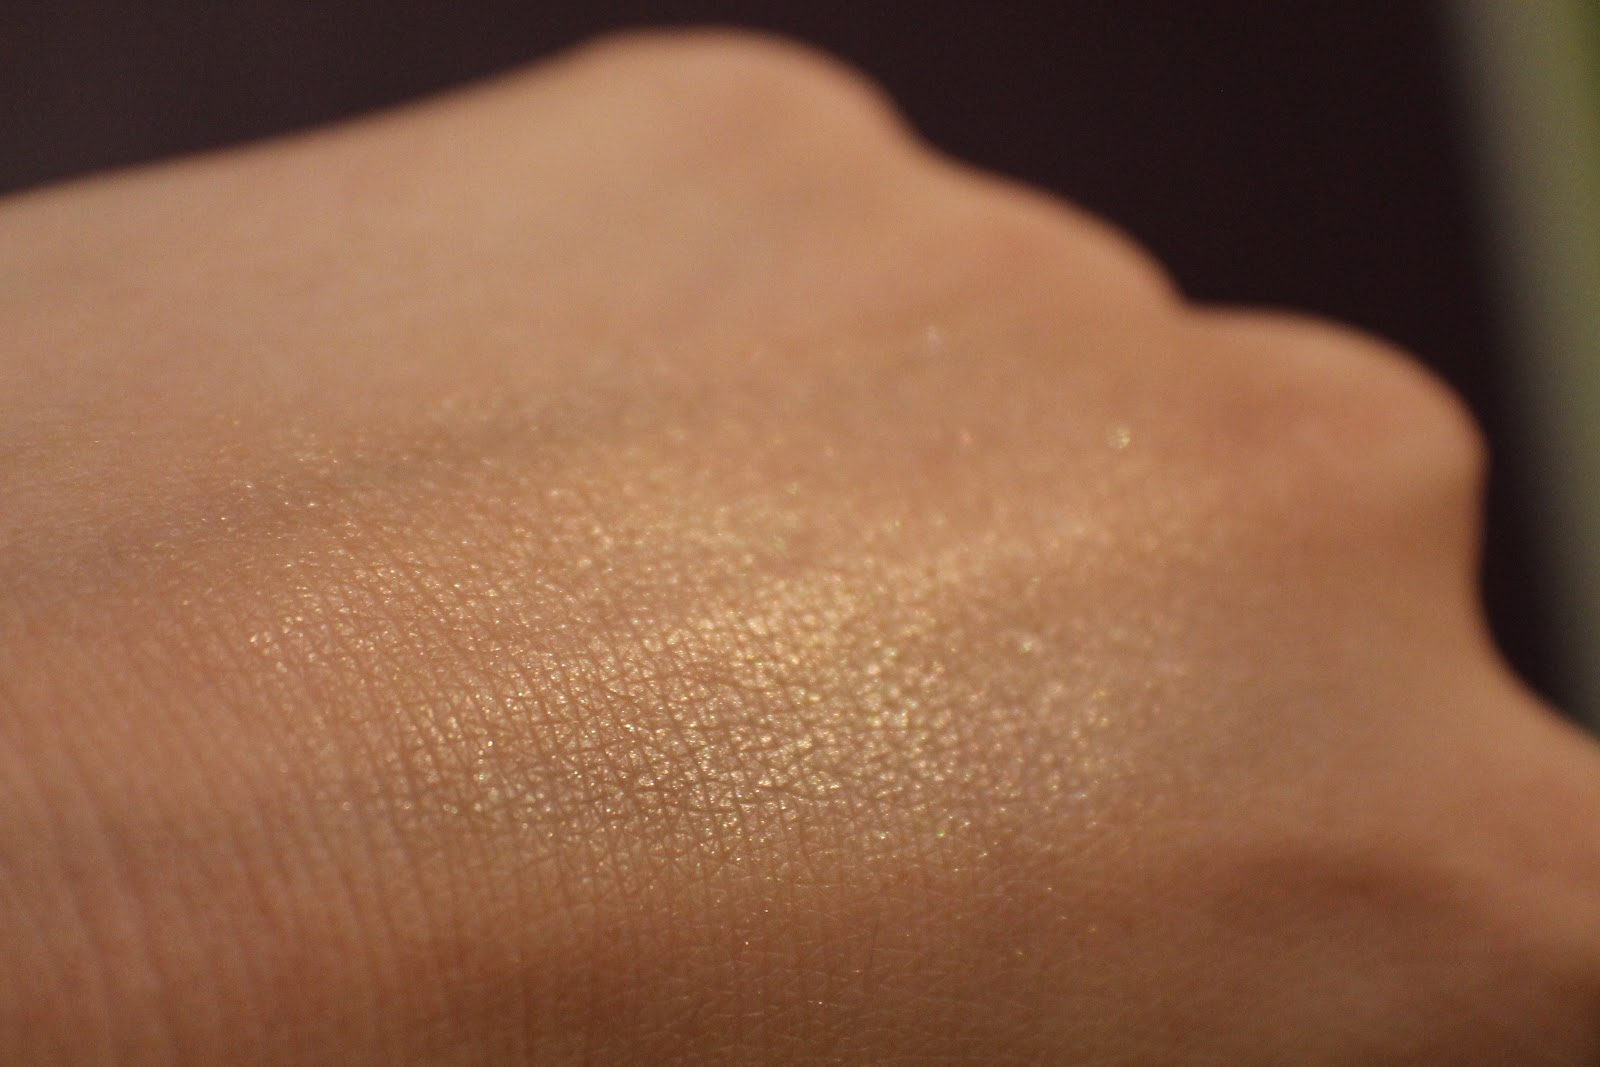
So there you have it my low down on my new loves. I bought them both for about $50.00. I know you can get them from Sephora in the U.S for $50.00. I would highly recommend investing in these babies, if not just one. I've put swatches on here so you can have a look at which one would suit you better.
Check them out here www.urbandecay.com .

Hope you're all having a Beauty-ful Day/Night!

Belinda
xx


Tuesday, 1 January 2013

Here's to an amazing 2013!!!

Hello Beauty-ful People!!

Well here in Australia it is coming to the end of New Years Day but luckily, there are people in other parts of the world that read my blogs that would still be partying it up!

I hope for those people that are out and about are being safe and drinking/partying responsibly but over anything, I hope you all are having an absolute ball!

For my fellow Aussies, I hope you had an amazing night last night/this morning and brought in the year in true Aussie style!.

My 2012 has been extremely challenging but it has taught me so much, and made me a much more determined and stronger person. I'm hoping for an amazing 2013 and believe it'll be my year to shine. I am determined to get this blog bigger and better and show you guys many more products and write about tips and tricks and of course I AM going to start filming at least one tutorial a week. I have so many plans for this blog and my YouTube channel and I hope that it turns out to be like I dream it will. I hope you all have an amazing 2013 and everything you wish and dream comes true. Just remember it doesn't matter what you dream off, if you are focused enough it WILL happen!.

What are your New Year's Resolutions?? Are you anything like me and always have some but they never seem to happen?? I've never done the whole writing a whole list of thing- it's just in the back of my mind. This year I have written down a few that I would really like to achieve. I'm not putting a lot of pressure on my self to get them done but I would be very happy and proud of my self if they do get done. I will tell you a few of mine and feel free to comment below if you want to tell me some of yours.

 - Learn Spanish, I had this last year but really lost my mojo after a lot of other things interfered. I plan to be able to speak basic Spanish Fluently by the end of the year, I really don't know if that's realistic but I am sure going to give it a go.
 - Write more blogs and Film more Tutorials for YouTube, because of life getting in the way in 2012 and travelling etc especially my YouTube channel got neglected. I am focused on filming so many tutorials and tips and tricks and other videos so you guys can learn some things.
 - Be more spontaneous. In the past I haven't been the most spontaneous person, I have slowly gotten better in the last 6 months but I want to do it a lot more, so I can experience random things. I am very lucky to live in such a beautiful country where an hour drive can take me to the most amazing places and could find some beautiful places I have never experienced before.

Those are a few of mine, although they aren't huge ones I think a lot of people make resolutions that are huge so they have less of a chance of getting them achieved.

I hope everyone had a magical and beautiful Christmas with their family and have an amazing New Year! I wish you all the most amazing year and thank you for the time you take to read my blogs when they come up, you will never know how much it means to me.

If you have any ideas of what you would like to see on my YouTube or Blog please comment and I can definitely look at getting that done.

Have a Beauty-ful Day/Night!

Belinda xx

Sunday, 18 November 2012

American Haul - Makeup, Makeup, Makeup!!!

Hello Hello Lovely people!
I hope you are all having an amazing weekend! I have recently come back from America. I was gone for 19 days and went to New York, Niagara Falls and Hawaii.
As most of you know Makeup is a lot cheaper in America than it is over here in Australia. MAC itself is half the price in America, so you can safely say I had A LOT of fun while I was over there!
I got a fair few amazing products so I thought I’d show you some of the ones I absolutely LOVE!!!

1.       MAC Lustre Drops in Pink Rebel.
Don’t you hate when your doing your makeup and you just want to have a nice dewy look but the only foundation you have is a matte foundation? Well this is the answer to all your problems! What I do is put the foundation (or BB cream as you know what I use) on the back of my hand and then put 2 -3 drops of the Lustre Drops on top of it and then mix it in. Then I put the product on my face as I would usually. It adds just a beautiful subtle sheen to your face. It comes in 2 colours. I purchased the goldy pink colour as I thought it’d be more natural. It comes in a small little dropper bottle but a little goes a long way, so the product would last a long time. I purchased this in America for $20USD but I expect it would be about $40AUD in Australia. Check it out here. www.maccosmetics.com.au.


2.       MAC Face and Body Limited Edition Pressed Powder Eyeshadows.
Now these are my official new loves. I actually saw one of these colours on the Makeup Artist in store and told her I must have that colour! Turns out there were multiple colours so me being me I bought all the ones that weren’t sold out. Unfortunately, 3 were sold out but I still was able to get 3. They were all different brown colours ranging from really really light to darker browns. They have a frosted sparkle to them and look absolutely amazing by themselves or over the top of just a plain brown over the lid. I use the MAC Fix Spray which I actually bought while I was over there as well. All you do is spray it on your brush and then put your brush in the eyeshadow and put it on your eyelid. The best thing as well when you’ve finished your makeup you can spray the Fix+ over your face and it sets your makeup – you know how I LOVE dual purpose products. I purchased the colours “Spot Lit” which is a light to medium brown. “Warming Heart” which  is a very light brown – almost a champagny brown. “Beaming” which is a Dark Brown. I can’t remember but I believe the fix+ was $20USD. You can buy the 100ml bottle in Australia for $27.00. The Eyeshadows were $20USD You can buy these for $40AUD in Australia (please keep in mind though, these are limited edition and will be selling very quick so may not be available.  Check it here www.maccosmetics.com.au .


3.       Napoleon Perdis Loose Eyeshadow in Mosaic Gold.
Although, I’m not generally a fan of Napoleon I do like some of their eyeshadows. I was in the airport in Sydney waiting for our connection to Brisbane so to waste time I went to have a look. I saw this colour and had to buy it. It is one of the prettiest colour and would look amazing on any skin tone. It looks white but when you put it on it’s an opaque pewter gold colour. It is very difficult to explain but it's so beautiful. I use it as a highlight and the nicest thing is you can change the contrast a bit. I sometimes put a white eyeliner pencil in the inner corner/tear duct area and then put it on top. It looks a bit white/pewter/gold like that but when I put it directly on the inner corner it gives more of a gold/pewter colour. It’s very subtle so it can be used for every day but then would look amazing for formals and weddings. I cannot wait to use this baby a lot more. I bought this eyeshadow for $35.00AUD. There a multiple colours available ranging from gold to brown to black to blue. Check it out here www.napoleonperdis.com.au.


4.       Urban Decay Naked Palette.
So I have wanted this Palette for SO long. I will do another blog on both of the palettes so I’ll go more in depth in that one. Here in Australia Urban Decay is pretty much impossible to get your hands on so I was lucky enough to get the Naked 2 Palette on EBay a few months ago but got this one while I was in America in Sephora. This Palette is the best go to palette EVER! It has neutral colours – Browns, blacks, highlights, greys, Golds, Silvers. They are very pigmented so you don’t have to put heaps of product on your brush just to get a little bit of colour. The eyeshadows are also nice and soft to go on. Another awesome thing is you get a free little Primer Potion in the Palette and also a brush. The primer potion is really good as well. I had already heard good things about it, but happy I had the opportunity to test it out myself. I love that if I’m going away or going to my friends place for the night I can literally put this in my bag and I can do so many different Makeup looks with just one small palette.  I have put swatches in the picture as well. I purchased this for $50.00USD. If you’re in Australia try and find it on EBay?.  Check it out www.sephora.com.


Well I hope you are all having/had a good weekend. If you  have any questions about how to use any of these products or any suggestions let me know.

Have a Beauty-ful Day/Night
Belinda
xx

Wednesday, 31 October 2012

Beauty with Belinda's Must Have Brushes!!

Happy Halloween Lovely people!!!!

Tonight, I wanted to discuss brushes.. I get asked all the time what type of brushes to use and what brushes are the easiest to get the best results. I do a fair few classes where I actually teach the techniques of these brushes which I can most certainly do on YouTube if you guys are wanting that kind of thing??

Obviously, this is my opinion. Every person has a different opinion, especially Make-up artists, but it is personal preference and I prefer these brushes and I find they give a beautiful finish and by far the easiest.

I have used Images from the Makeup and Glow website. My brushes are obviously not brand spanking new and I use them a lot so I preferred to put up pictures that look a lot nicer :). I don't use all of these exact Brushes but I know for a fact Makeup and Glow stock absolutely beautiful brushes, but obviously the brushes all pretty much do exactly the same thing.

1. Makeup and Glow Bent Detail Liner Brush #120
   - This brush is amazing if your not that great with putting on eyeliner. It pretty much does your whole job for you. You just put the brush in some gel liner ( My favourite is the Makeup and Glow Gel Liner in Black ) then run the brush along the eye as close to the lash as you can get and then once you get to the end the bent part of the brush does the perfect flick so you can have a subtle flick or a dramatic cat eye look.
You can purchase this Brush for $9.90 (before discount) http://www.makeupandglow.com.au/Makeup-and-Glow-Bent-Detail-Liner-120-p-16945.html
2. Makeup and Glow Blending Brush #26
    - This Brush is a MUST! Any Makeup Artist will tell you that this is one of the best inventions. It's pretty much self explanatory. This brush can make a simple look go that little bit further in detail. It smooths out any lines that you have when you apply your eyeshadow and obviously blends everything in together.
You can purchase this Brush for $14.40 (before discount)
3. Makeup and Glow Crease/Bullet Brush #250 
     - This Brush is as well pretty self explanatory. It is a brush so that if you're wanting a bit more definition through your crease you can put it through the crease (the hollow in your the separates your lid from your upper eye) also, I use it in the very side corner of the eye when you want to add that little bit extra depth with another colour (for example a bit of black with a smokey eye to make it a bit darker but not over the top dark). You can also use this brush on the lower lash line to add some dimension with out a harsh line. 
This Brush can be purchased for $22.90 (before discount)
4. Makeup and Glow Pro Powder Brush #340
   - Everyone should have a powder brush, whether it's to put some powder on every day or if you prefer to use one brush for powder, blush and bronzer. It is a very good staple brush. Especially if your travelling it can save you on packing a few brushes. Once I put my powder, bronzer and blush on (I personally use all different brushes for all) I get a powder brush and just brush it over my face just to make sure everything blends beautifully together (especially if your doing your makeup half asleep and it's dark - haha).
This Brush can be purchased for $26.90 (before discount) http://www.makeupandglow.com.au/Makeup-and-Glow-Pro-Powder-Brush-340-p-16960.html
5. Designer Tools Large Fluff Shadow Brush - 463-10
   - I am in love with my fluffy brush! It's almost like the blending blush but bigger and less definition. I use the Blending brush when I want to add a bit more depth to my work. You can use this brush to blend out any lines as well. But also I use it when my work needs a bit more softening. I put it in a light brown and put around the crease/above the crease and the general eye area and it looks amazing. 
This brush can be purchase for $5.95 (before discount) http://www.makeupandglow.com.au/Large-Fluff-Shadow-Brush-463-10-p-17394.html

6. Duo Fibre Buffer Brush
   - I am seriously in LOVE with this brush.. I don't wear foundation like ever but as you know I do wear BB cream (almost like a tinted moisturiser) I put a bit of my BB cream on the back of my hand then use my finger to disperse it around my face. I then get the buffer brush and buff it into my skin. What I love about it is, you really don't have to use a lot and it gives you a beautiful flawless look without feeling caked on. A definite must this brush!
This Brush can be purchased for $26.95 (before discount) http://www.makeupandglow.com.au/Duo-Fibre-Buffer-Brush-p-17663.html

7. Designer Tools Angled Contour Brush - 417-18
   - Once again a self explanatory brush - makes my job easier yay! So contouring is an amazing technique, it can make your nose look smaller, your forehead look smaller, your cheekbones stronger, your jawline stronger, can hide the double chin a bit - I could go on for days but my point is... it's awesome!. So every day you obviously do not want to contour hard core so this brush makes it easy. All you do is put it in your bronzer, and turn the brush to the side so the higher point is facing towards your mouth or to your ear (it's personal preference what feels more comfortable to you) just under the cheek bone and brush away! - if you cannot find your cheekbone do the always popular fish  face and you can find the indent where you're meant to put the bronzer to make it more prominent. I also put a bit of bronze in my temple area and if you have  a big forehead just dust it across the side and top of your forehead. You can of course use this brush as a blush brush as well just sweep it across the apples of the cheeks and up.
This Brush can be purchased for $7.95 (before discount) - http://www.makeupandglow.com.au/Angled-Contour-417-18-p-17384.html

8. Designer Tools Small Eyeshadow Brush - 429-06
   - There's nothing ridiculously special or amazing about this brush, it's just a good and easy brush to have. It's exactly what it says. if you're having a lazy day and just want one colour of eyeshadow on your lid - well this is your brush. I use a brush like this all the time just to put the base eye shadows on and then from there you can use the blender brushes and crease brushes to add more dimension and depth.

This Brush can be purchased for $8.95 (before discount) - http://www.makeupandglow.com.au/Small-Eyeshadow-Brush-429-06-p-17385.html

9. Designer Tools Fine Angle Liner Brush - 406-06
  - I use this brush multiple ways. I use it as a brow definer. I just put it in some brown eyeshadow - or whatever colour you need and then brush it through your brows and then you can put it on it's side and define those front parts of your brows that have a lot spacers (well I have those kind of brows :( ). It gives you a beautiful defined brow without looking like they've be drawn on. Another way to use it is for liner. Some people put it in gel liner and brush it against the lid along the lash line. I actually put it in black eyeshadow and go over the top of my gel liner that I put on with the Bent Liner so that it gives a bit more staying power for the Gel Liner. Another way is I put it in what  ever colour I need (usually brown or Black) and put it against my lash line on the bottom lasshes. I have very dark eyes so it looks very funny if I just put liner on the top but I don't want to have strong liner along the water line etc every day so it gives it a bit of definition but it's soft and flawless..
You can purchase this brush for $7.95 (before discount) http://www.makeupandglow.com.au/Fine-Angle-Liner-406-06-p-17378.html

Obviously, there are a lot more brushes that I absolutely love, but if I went on holidays or was stuck on a desert island with just those brushes and products I would have amazing makeup every day.

If you have any questions at all please let me know. I'm going to put together a YouTube video tomorrow explaining brushes and showing how to use them - as it's a bit hard to explain in writing sometimes.. I think I did OK though.. right??

Well I hope everyone is having an absolutely fantabulous night (yes, tonight I am making up words). Please be safe and anyone from America that tunes into my Blog I hope you are all safe and pray that everything settles down for you and there is not a lot of damage to your lives because of this heart wrenching tragedy. Australia sends all of our love and support.

Have a Beauty-ful Night/Day!!

Belinda
xx


Monday, 1 October 2012

Review: Blinc Mascara

Good Evening Lovely people!!

I am just soo excited to talk about this product!! I was given this product to play with from Makeup and Glow, here in Brisbane as they were so excited about this product they wanted to see I would agree.. and let me tell you – I certainly do!!.
Do you ever get sick of clumpy lashes? Or us emotional girls, looking like a panda or some crazy person from Nightmare on Elm Street afterwards? Or getting that awful fallout of clumps under your eyes? Or that horrible horrible lashes sticking together so it looks like you have 3 lashes? Well I have the answer for you!
Blinc Mascara. This Mascara literally puts a little tube around your lashes so you’re not painting them. Once it’s applied to your lashes it cannot run, smudge, clump, or flake. Another pretty awesome thing about it – especially for people like me. I always want to rub my eyes as I have allergies. With this Mascara if something happens and you desperately need to rub your eyes – you can! ( Although you may ruin the rest of your eye makeup – haha). It adds length so it gives you that added va va voom. It literally doesn’t budge until you are ready for It to come off. When you decided it is time for your amazing lashes to go away for the night all you have to do is use warm water on a wash cloth or anything along those lines and it’ll literally just slide off. This product is perfect for those sensitive eyes and contact lense wearers.
This amazing product can be purchased from Makeup and Glow instore or online www.makeupandglow.com.au for $34.95 (If you’re a Makeup Artist you are entitled to a 10% discount). I would highly recommend visiting the lovely ladies in shop or having a look online. They know everything there is to know about Makeup and also have a Makeup Academy now so for you that would like to be a Makeup Artist or if you already are and want to brush up on your skills definitely check them out.
Hope you have a Beauty-ful Night/Day.
Belinda
xx


Reviews: Blush's I love (Cream and Powder)

Hello my lovely ladies/gents!

Tonight I thought I'd write about blushes... Some of us only use a little bit just to add a little bit of colour to ourselves but some of us also use a lot. Fellow Makeup Artists also use them for different looks we want to achieve for brides, editorial or print work as well.. Either way it is very much a staple for any female..and some of you males out there too.

I'm going to go through my favourite blushes that I've been playing around with a lot lately. I'm going to incorporate some cream blushes as well as sometimes for print work we need to avoid powder, but sometimes it's just peoples preference.

1. I have already blogged about NARS Orgasm before but it needs another mention. This is always in my make up kit or bag. It it a beautiful colour that isn't too full on and will look absolutely beautiful on most skin tones. Find here www.nars.com.au

2. Makeup and Glow Mosaic Blushing powder. This beautiful blush is a mosaic one, so it has many colours all in one so you get more a unique colour. This one in particular called "blushing" has some beautiful pinks, deep pinks, browns and a beautiful highlight white so you also get that gorgeous highlighted look. This blush goes on beautiful and you can build it up or just a little bit to add some colour. You definitely get a lot of bang for your buck with this product as you don't need a lot of product which I absolutely love. For those people who have sensitive skin, this would be perfect for you as it's hypoallergenic. Find here www.makeupandglow.com.au. This can be purchased for $33.00 from Makeup and Glow in store or online. I was kindly provided this product by Makeup and Glow

3. Graftobian Hi-Def Glamour Creme Blush Palette. Now this product is for you out there that don't necessarily like the feel or look of powder products. There are 5 different colours in this palette and this specific one ranges from peachy pinks all the way up to burgundy and deep red. These are so beautifully creamy I literally want to just put them on my skin all day. The awesome thing about these are their a double product you can most certainly use them as lipstick as well - woohoo!. This particular palette really is so versatile as it will suit any skin tone - so would be perfect for you Makeup Artists out there who don't want to pay $30 for each blush. You can get 5 colours for $33.00 (also remember if your a Makeup Artist you can get a 10% discount. Find here www.makeupandglow.com.au. I was kindly provided these by Makeup and Glow. 

4. FACEatelier Facade. Once again this is another beautiful Creme Blush, but can also be used as a lipstick. It is a beautiful deep pink colour -called Arabesque. This is beautifully soft and smooth on the skin and just goes on like a dream. It is extremely easy to work with so the people out there that don't have the experience, yet wants to try something different - you can't really go wrong with this product. And like previously stated it's awesome that you get two uses for one product. This can be purchased online or in store at Makeup and Glow for $36.00. Find here www.makeupandglow.com.au. I was kindly provided this product by Makeup and Glow.

Have fun ladies with your blush. If you want it as just a bit of colour or as a bold expression just have fun with it and you'll feel amazing. Obviously, as usual if you have any questions or suggestions of other products to try please let me know..

Have a Beauty-ful night/day.

Belinda
xx


Sunday, 16 September 2012

Review: BLYNC Eyelashes

Well Hello Lovely Ladies/Gentleman!

So tonight's blog will interest pretty much anyone who has any interest with Makeup whatsoever!.

Whether, you love something over the top dramatic, or just accentuating your natural eye or maybe you have a few bald spots and need a few individuals to go in - the fact of the matter is we all love false lashes!!

Me, personally - I love the lashes that just accentuate your natural eye but obviously, being a Makeup artist it is a bit fun to add some really dramatic lashes for a fun look. I am a bit picky when it comes to Eyelash brands as sometimes they do not look like your eyelashes and they stick out like sore thumbs and some aren't soft and uncomfortable to wear and I wouldn't wear that so I wouldn't expect anyone to wear them.

As I have said in previous blogs, I was lucky enough to be given some products from Makeup and Glow here in Brisbane and these babies were in there. I have 3 sets here.
       1. Rosebud - these are beautiful Natural strip lashes, and also can be cut in half as half lashes if you're not wanting something so big.
       2. Audrey - These are some gorgeous dramatic lashes - they would look stunning for a dress up party or if you have done a deep smokey eye or with some glitter. I wouldn't recommend these if your wanting something very subtle and natural.
      3. Cha Cha Cha - Now these are my favourite and I use these all the time with Brides, as usually they don't want something dramatic but still want a little somethin' somethin'. They are 3/4 lashes so you don't have to worry about the drama of cutting the lashes - yay!.

These lashes are amazing quality, they feel comfortable - even the big luscious ones. They are quite soft so they blend in nicely with your natural lash.

What I like most about these are that they're easy to use. Some lashes that are around take so long to put on, and you sort of get so sick of playing around with them you just give up and put an extra coat of lashes on.

If you don't know how to put lashes on all you have to do is do your Makeup as you want to, put a coat of Mascara on your natural lashes and then take the lashes off the tray carefully. Put some lash glue along the strip, I like to let it dry a little bit for a few seconds and then place one side of the lash on and then work your way along the rest of the lash. Then let them dry so they don't budge.

I get a lot of brides get worried about how to take lashes off. Do not stress my pretties, you literally just get one edge of the lash and pull off gently at the end of the night. It won't hurt, it won't stay on for a few days - so it's all nice and easy!.

These lovely lashes can be bought for $9.95 (Remember you may be entitled to a trade discount as well)  at Makeup and Glow (online or in store) and there are many different lashes available ranging from dramatic, natural and individual lashes.

Check out Makeup and Glow www.makeupandglow.com.au.

Hope you have a Beauty-ful Night/Day!!

Belinda
xx